The Surf Fishing Rigs
|
 |
 |
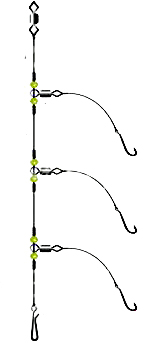 |
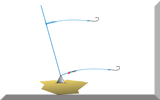
One, Two and Three-Hook Flapper Rigs
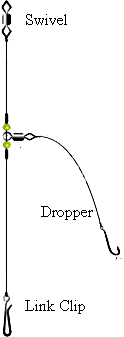
Flapper rigs have the hook snood (or 'dropper') coming off the main body line at right-angles. We all used to make these rigs up by tying dropper loops in the body line and attaching the hook snoods with cow hitches.
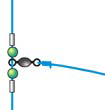
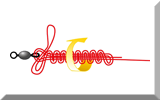
A much better approach is to tie the hook trace onto a swivel, and locate the swivel on the body line between a couple of beads and locking crimps. This gives the snoods a much better chance of dealing with any line twists caused by the bait flapping around as it flies through the air on the cast, or on its journey to the seabed. Bit of a clue there as to why it's called the flapper rig.
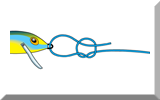
Use the Uni-Knot for making all the connections, unless the hook has a turned up or turned down eye - in which case connect the hook with the Snell Knot.
On a two or three hook flapper rig, the lower snood can be longer to give better bait separation on the seabed. Tied in this way, they're known as '1up-1down' or '2up-1down' flapper rigs. Flapper Rig Variants... One-hook flapper rigs:~
Two-hook flapper rigs:~
Three-hook flapper rigs:~
|
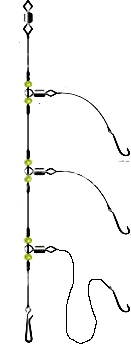 2 Up, 1 Down Flapper Rig |
For large fish and large baits then the single hook flapper rig is the one to use. Conversely, for smaller fish and smaller baits, a two or three hook flapper rig is the way to go. Remember that the more bait you get out there, the greater will be the scent that will lead the fish to your hooks - but the more difficult it will be to cast any distance.
Clipped Rigs; for Longer Range Surf Casting
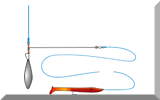
Leaving the baits to flap around will take 20 per cent or more off your ultimate casting distance. A clipped surf fishing rig will solve this problem by streamlining the entire rig.
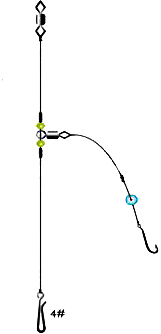
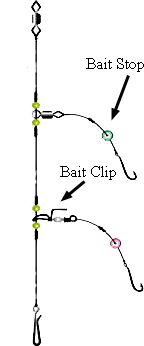
As you can see from the the sketches below, clipped rigs are more complex than the flapper rigs, involving two additional components:~
- a bait clip for each snood, and
- a bait stop for each snood
 |
 |
 |
One, Two and Three-Hook Clipped Rigs
Each of these 1, 2 and 3-hook clipped rigs terminates in a link clip rather than a bait clip, which means that an impact lead must be used to privide a clip for the lower hook to be clipped to.
In the 2 and 3-hooked rigs, the rolling swivel at the inner end of the dropper has been replaced by a cascade swivel which incorporates a clip for the hook above it.
Still with me We'll take a look at the various options for clipping down your bait, then all will become clear...
Clipped Rig Accessories
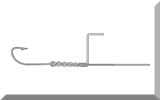
First, the bait clip... This is a small refinement to the link clip for connecting your casting lead to the end of the rig body line. Nothing more in fact, than a simple bent down extension over which you slip the bend of the hook. Now the bait will be held tight up to the lead weight during the cast, and will fall off when the rig hits the water - hopefully not before. If you choose to use a link clip, then you'll have to also use either an impact shield just above it or an impact lead. |
Link Clip Bait Clip |
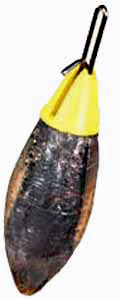
Impact Leads... These are the impact leads described above, for use with a link clip. These have the bait clip built-in alongside the attachment eye, as shown. In strong tides you may have to go for the piked version to keep the rig anchored where you want it. |
  |
The Impact Shield... Thirdly, you could use a standard link clip together with an impact shield. These are threaded on the rig main body line just above a standard link clip. They serve two purposes; first to provide a clip for the lower hook, and also to provide some protection for the bait as it splashes down at the end of the cast. |
 |
Cascade Swivels... You can see how cascade swivels are used in the two and three hooked examples shown above. The top hook is clipped to the cascade swivel of the second hook snood, and so on. This works fine until you want to use a long 'down' snood on the lower hook. It simply fall off in mid-cast. Enter, the Loop Rig... |
Bait Stops...
In all of the sketches of clipped rigs, you'll see a bait stop just above the hook. The reason for these is that, during casting, the clipped-down hooks fly 'bend first' through the air which blows the bait over the eye and up the snood - or it would, were it not for the bait stop to prevent this happening.
An un-clipped flapper surf fishing rig will allow the hook to fly 'eye first' which keeps the bait located firmly in the bend of the hook - so bait stops aren't needed.
The Loop Rig; for Casting Long Hook Snoods
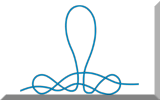
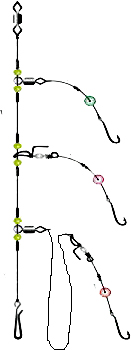
The lower dropper in a '1-up, 1-down' or '2-up, 1-down' version of the clipped down surf fishing rig would be too long overall for all practical purposes - casting the beast would be a nightmare - but of course the ever-resourceful surf anglers have come up with solution. It's called the loop rig. In it the cascade swivel is tied in the snood close to the hook. This clips the lower bait in tight and forms a loop in the line between the rolling swivel and the cascade swivel - ingenious or what There's no better long-range multi-hooked surf fishing rig. |
 |
One thing's for sure - you really don't want to be messing with multi-hook clipped rigs or loop rigs unless you have to! My advice is to stick with flapper rigs unless it's imperative to get your bait as far out to sea as possible. Keep it simple!
The Pulley Rig; for Fishing Over Rough Ground
Fishing over rough ground with a 2 or 3 hook rig is just asking for it, so you'd be wise to resist any such temptation.
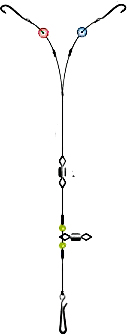
Often though, it's the lead weight that gets caught up as it trails astern of a hooked fish. The Pulley Rig has been designed to eliminate this risk by allowing the weight of hooked fish to pull the lead weight into a position ahead of the fish, where it is much less likely to get hung up.
 |
 |
|
Single Hook Pulley Rig |
Pulley Pennel Rig |
Pulley Wishbone Rig |
Used with an impact lead or an impact shield, the simple pulley rig is capable of being cast very long distances indeed.
As a long range surf fishing rig it's often used with a tandem hook pennel rig for large baits - and big fish...
But if you really must use two smallish baits, then the wishbone rig version is the way to go.
