The Best Ballyhoo Rigging Method for Offshore Trolling
|
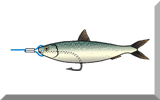
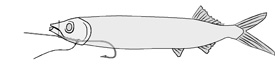
The length of the haywire twist should be such that distance from the final twist to the bend of the hook is just over half the length of the bait. |
 |
Don?'t snap off the wire in the normal way, but leave a spike sticking up in the same vertical plane as the hook.
Note ~ In the illustration the haywire twist is too short. My fault, I'll change it as soon as I can.
Stage 2
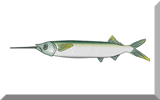
Then, insert the hook point under the gill cover and work it through into the body cavity.
Bring the hook point out through the belly, leaving the spike under the bait?s head. |
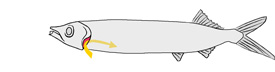 |
After checking that the hook and the spike are in the same plane, push the spike up and out through the top of the head level with the eyes.
Stage 3
Next, check that the hook moves freely where it exits the fish?s belly.
If it doesn't, carefully cut a longitudinal slot at the point of entry with a sharp knife so that it can. |
 |
Note ~ As the haywire twist is too short in the illustration, the hook exits in the wrong place. Done correctly the hook would exert just over halfway down the fish.
Stage 4
Now?lock the spike to the fishes head with a small elastic band
Hook one end over the spike, wrap it once or twice around the head and hook the other end back over the spike. Alternatively you can use monel or light copper wire instead of the elastic band. |
 |
Poke the wire through the eye sockets, wrap the ends around the head behind the spike and finish off with a few turns around the bill stub, which will locate the leader in the groove we mentioned earlier.
Stage 5
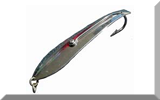
Finally,?eyeball the ballyhoo head-on.
The hook and the head-spike must all be on the centreline in the vertical plane, or the bait will spin.
Hold the leader and let the bait hang down. Double-check that the hook's not pulling on the belly.
Properly rigged, the bait will be towed by the head spike and won?t spin. If it does, tweak the rig until it doesn?t or start again.
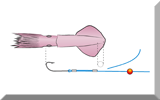
Rigged in this way, your ballyhoo will skip along, or just under the surface. If you want to troll deeper, slide an egg sinker down the line to the head of the bait, and secure it in place with soft wire.
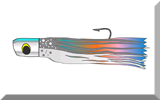
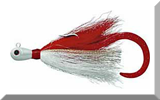
The final embellishment is to slide a lure - such as sea witch, trolling feather, straight runner, clone, jethead or simply an octopus skirt - down the leader so that it locates against the egg sinker if you'?re using one, or the nose of the bait if you'?re not.
But if your target fish is dorado or tuna, you may want to take your chances with wahoo and their toothy chums, and go for a less visible mono leader.
80lb breaking strain is as light as you should go, using one crimp to secure the hook and another to attach the separately formed L-shaped spike in the appropriate position. A chin weight can be incorporated into the crimped hook connection if required.
The Bait Rigging Kit You'll Need
If you haven't already got one, you're going to need a Crimping Tool Clearly, the rig must be properly made up, so here's some tips on using your ballyhoo rigging kit like an expert bait rigger... |
  |